Scapy p.03
Scapy Interactive Mode
Running Scapy
Scapy can be run in two different modes, interactively from a terminal window and programmatically from a Python script. Let's start getting familiar with Scapy using the interactive mode.
Scapy comes with a short script to start interactive mode so from your terminal you can just type scapy:
localhost:~ packetgeek$ scapy
                     aSPY//YASa
             apyyyyCY//////////YCa       |
            sY//////YSpcs  scpCY//Pp     | Welcome to Scapy
 ayp ayyyyyyySCP//Pp           syY//C    | Version 2.4.2
 AYAsAYYYYYYYY///Ps              cY//S   |
         pCCCCY//p          cSSps y//Y   | https://github.com/secdev/scapy
         SPPPP///a          pP///AC//Y   |
              A//A            cyP////C   | Have fun!
              p///Ac            sC///a   |
              P////YCpc           A//A   | We are in France, we say Skappee.
       scccccp///pSP///p          p//Y   | OK? Merci.
      sY/////////y  caa           S//P   |             -- Sebastien Chabal
       cayCyayP//Ya              pY/Ya   |
        sY/PsY////YCc          aC//Yp
         sc  sccaCY//PCypaapyCP//YSs
                  spCPY//////YPSps
                       ccaacs
                                       using IPython 7.2.0
>>>
Basic Scapy Commands
To see a list of what commands Scapy has available, run the lsc() function:
>>> lsc()
arping              : Send ARP who-has requests to determine which hosts are up
bind_layers         : Bind 2 layers on some specific fields' values
fuzz                : Transform a layer into a fuzzy layer by replacing some default values by random objects
ls                  : List  available layers, or infos on a given layer
promiscping         : Send ARP who-has requests to determine which hosts are in promiscuous mode
rdpcap              : Read a pcap file and return a packet list
send                : Send packets at layer 3
sendp               : Send packets at layer 2
sniff               : Sniff packets
split_layers        : Split 2 layers previously bound
sr                  : Send and receive packets at layer 3
sr1                 : Send packets at layer 3 and return only the first answer
srflood             : Flood and receive packets at layer 3
srloop              : Send a packet at layer 3 in loop and print the answer each time
srp                 : Send and receive packets at layer 2
srp1                : Send and receive packets at layer 2 and return only the first answer
srpflood            : Flood and receive packets at layer 2
srploop             : Send a packet at layer 2 in loop and print the answer each time
traceroute          : Instant TCP traceroute
tshark              : Sniff packets and print them calling pkt.show(), a bit like text wireshark
wireshark           : Run wireshark on a list of packets
wrpcap              : Write a list of packets to a pcap file
>>>
Note: I truncated this list to show the commands we will be discussing in this guide.
Wow, what a great list of commands! I'll at least introduce most of these commands, and there are a few that we'll use extensively. For the next few topics, we'll specifically be covering: ls(), send(), sniff(), and sr*().
In fact, let's go ahead and use one of those now to show off some of the amazing built in capabilities of Scapy! I'm going to sniff a single packet real quick and then we'll play around with that.
>>> pkt = sniff(count=1)
>>> type(pkt)
scapy.plist.PacketList
>>> pkt

>>> pkt[0].summary()
'Ether / IP / ICMP 172.16.20.10 >>> 4.2.2.1 echo-request 0 / Raw'
>>>
So, what I've done here is defined a pkt variable that is equal to whatever sniff() returns. In this case, that will be a single packet since I've passed in the count argument with a value of 1. Our pkt now holds an array containing single packet. If we increased count to a value of 2 or greater, then sniff() will return an array of all those packets. I'll show you how to access each packet individually a little bit later.
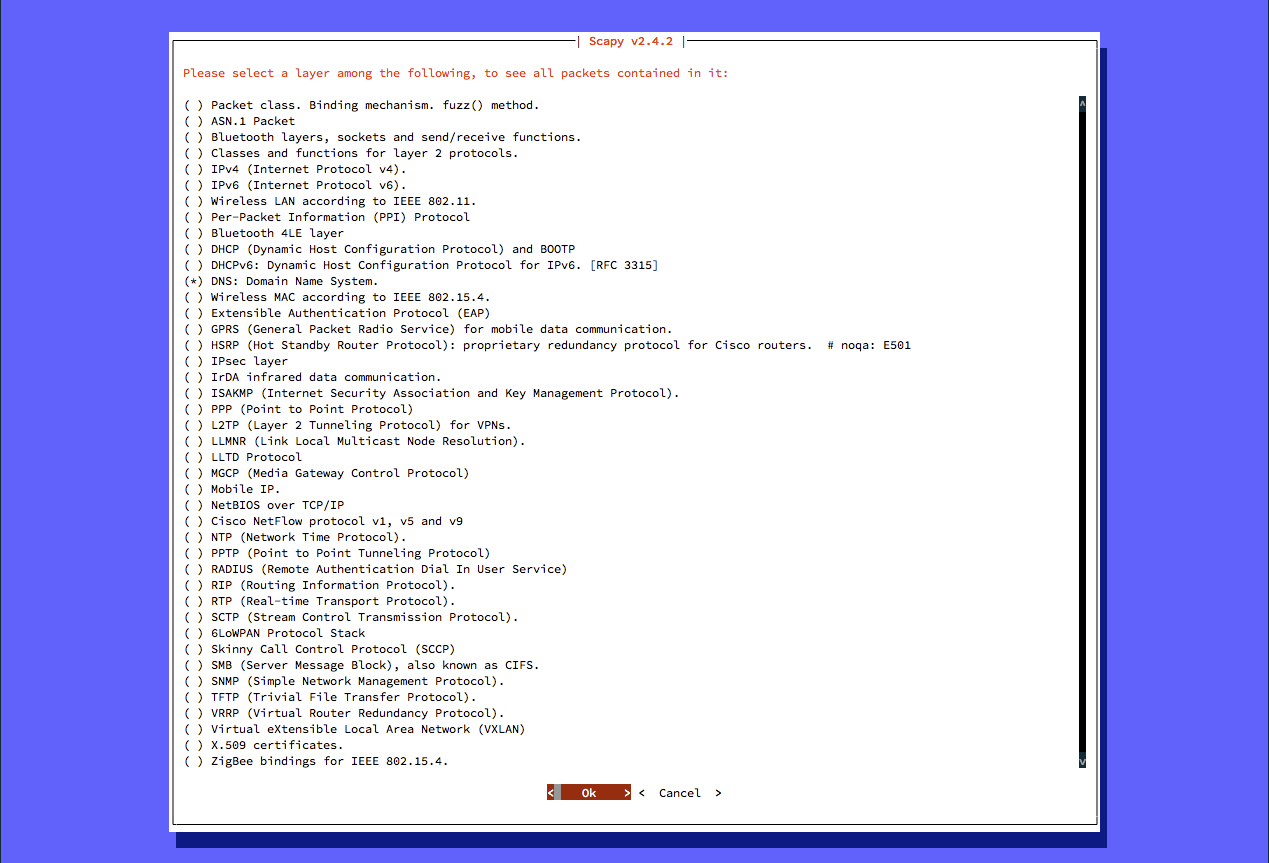
But wait, how does Scapy know that this packet contains Ethernet, IP and ICMP layers!? I'm glad you asked, Scapy has a wide range of built in protocol support. The list is much to long for me to print out here, so I'll let you run this next command on your own.
The explore() function provides a GUI for viewing and selecting protocol layers:

Packets contained in scapy.layers.dns:
Class                    |Name
-------------------------|------------------------------
DNS                      |DNS
DNSQR                    |DNS Question Record
DNSRR                    |DNS Resource Record
DNSRRDLV                 |DNS DLV Resource Record
DNSRRDNSKEY              |DNS DNSKEY Resource Record
DNSRRDS                  |DNS DS Resource Record
DNSRRNSEC                |DNS NSEC Resource Record
DNSRRNSEC3               |DNS NSEC3 Resource Record
DNSRRNSEC3PARAM          |DNS NSEC3PARAM Resource Record
DNSRROPT                 |DNS OPT Resource Record
DNSRRRSIG                |DNS RRSIG Resource Record
DNSRRSOA                 |DNS SOA Resource Record
DNSRRSRV                 |DNS SRV Resource Record
DNSRRTSIG                |DNS TSIG Resource Record
EDNS0TLV                 |DNS EDNS0 TLV
InheritOriginDNSStrPacket|
Or directly explore a specific layer (without the GUI selector):
>>> explore(scapy.layers.dhcp)
Packets contained in scapy.layers.dhcp:
Class|Name
-----|------------
BOOTP|BOOTP
DHCP |DHCP options
You can also use the ls() command to view the available protocols and fields for each layer. In Scapy Interactive mode, run the ls() command and just look at ALL the supported protocols.
>>> ls()
ARP        : ARP
ASN1_Packet : None
BOOTP      : BOOTP
...
As you can see, Scapy has a huge range of supported protocols. We'll only work with a handful of those in the upcoming topics but feel free to dig into them more for your own network tools. To see the fields and default values for any protocol, just run the ls() function on the protocol like this:
>>> ls(Ether)
dst        : DestMACField         = (None)
src        : SourceMACField       = (None)
type       : XShortEnumField      = (0)
>>> ls(IP)
version    : BitField             = (4)
ihl        : BitField             = (None)
tos        : XByteField           = (0)
len        : ShortField           = (None)
id         : ShortField           = (1)
flags      : FlagsField           = (0)
frag       : BitField             = (0)
ttl        : ByteField            = (64)
proto      : ByteEnumField        = (0)
chksum     : XShortField          = (None)
src        : Emph                 = (None)
dst        : Emph                 = ('127.0.0.1')
options    : PacketListField      = ([])
>>> ls(UDP)
sport      : ShortEnumField       = (53)
dport      : ShortEnumField       = (53)
len        : ShortField           = (None)
chksum     : XShortField          = (None)
Now that we have a better idea of the Scapy commands and protocol support, let's dig into some packets.